;fill-rule:nonzero;stroke:%23000;stroke-width:48.7px;'/%3e%3cdefs%3e%3clinearGradient%20id='_Linear1'%20x1='0'%20y1='0'%20x2='1'%20y2='0'%20gradientUnits='userSpaceOnUse'%20gradientTransform='matrix(2406.25,-2101.13,2101.13,2406.25,1086.43,2157.14)'%3e%3cstop%20offset='0'%20style='stop-color:%232d1f30;stop-opacity:1'/%3e%3cstop%20offset='1'%20style='stop-color:%239f5060;stop-opacity:1'/%3e%3c/linearGradient%3e%3c/defs%3e%3c/svg%3e)
Media center remote: Infrared receiver
2021-09-04
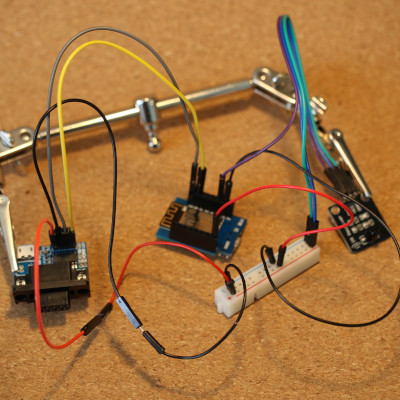
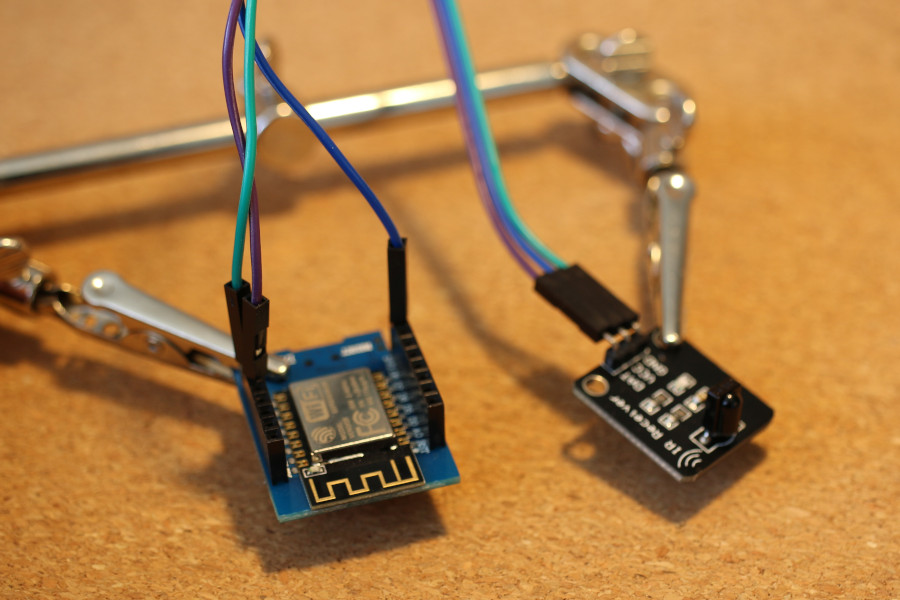
The first stage of making the
Media center remote is setting up a basic ESPHome
configuration to receive and decode infrared signals.
The goals of this stage are to:
- Get the ESP8266 to connect to a WiFi network.
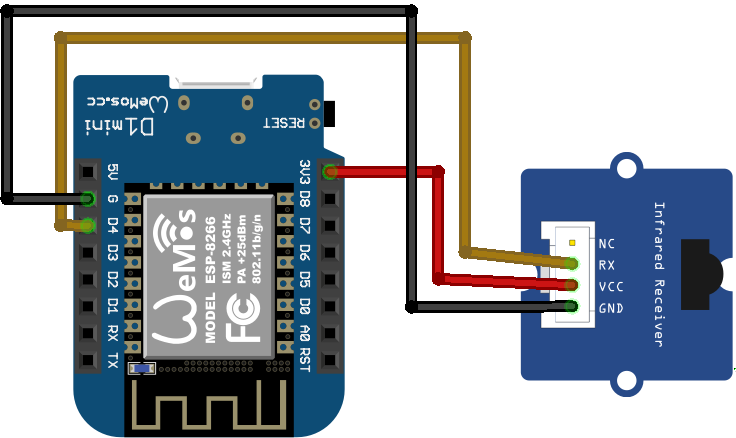
- Get the infrared receiver wired up to receive and log incoming infrared signals.
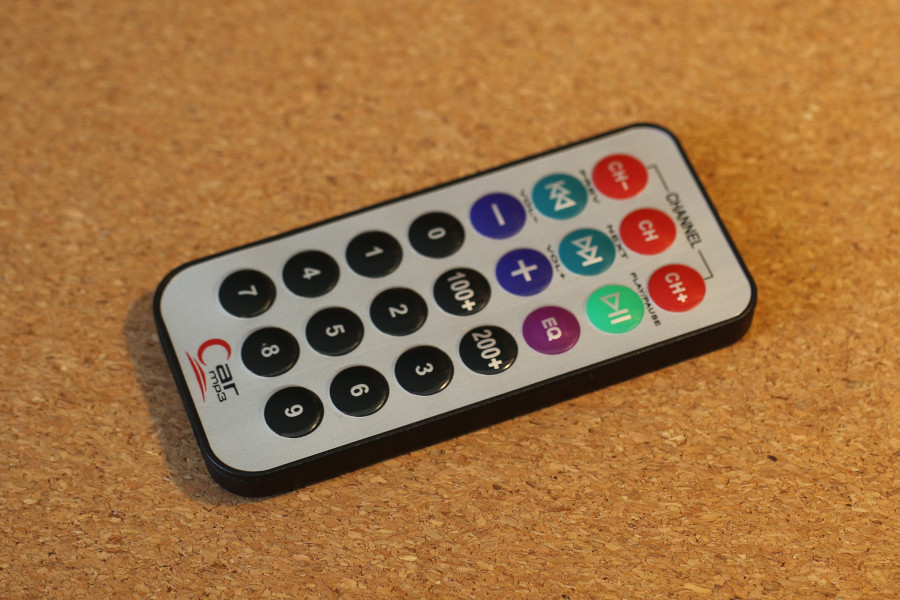
- Correlate the remote controller button presses to the resulting signals.
ESPHome configuration
media-center-remote.yaml
esphome:
  name: media-center-remote
  platform: ESP8266
  board: esp01_1m

api:
  password: !secret media_center_remote_ota_password

logger:
  baud_rate: 0

ota:
  password: !secret media_center_remote_ota_password

wifi:
  ssid: !secret wifi_ssid
  password: !secret wifi_password
  # Skip searching for available networks first
  fast_connect: true
  # Connecting is faster and more reliable if you don't wait for DHCP.
  # Just make sure the router is also configured to reserve this address for your device.
  manual_ip:
    static_ip: !secret media_center_remote_wifi_manual_ip_static_ip
    gateway: !secret media_center_remote_wifi_manual_ip_gateway
    subnet: !secret media_center_remote_wifi_manual_ip_subnet

remote_receiver:
  pin:
    number: GPIO2
    inverted: true
  # The Car MP3 remote controller signals can be interpreted as LG codes,
  # so let's just pretend it's an LG remote controller.
  dump:
  - lg
Log output
Powering up the device and pressing buttons on the remote controller yields logs similar to the following:
...
[17:48:34][C][remote_receiver.esp8266:059]: Remote Receiver:
[17:48:34][C][remote_receiver.esp8266:060]:   Pin: GPIO2 (Mode: INPUT, INVERTED)
[17:48:34][C][remote_receiver.esp8266:065]:   Buffer Size: 1000
[17:48:34][C][remote_receiver.esp8266:066]:   Tolerance: 25%
[17:48:34][C][remote_receiver.esp8266:067]:   Filter out pulses shorter than: 50 us
[17:48:34][C][remote_receiver.esp8266:068]:   Signal is done after 10000 us of no changes
...
[17:48:47][D][remote.lg:053]: Received LG: data=0x00FFA25D, nbits=32
[17:48:49][D][remote.lg:053]: Received LG: data=0x00FF629D, nbits=32
[17:48:50][D][remote.lg:053]: Received LG: data=0x00FFE21D, nbits=32
Next steps
With the infrared receiver working, it's time to react to these signals in Stage 2:
Media center remote: Kodi integration.
This article is part of the Media center remote set.
If you have feedback or questions about this article, let's catch up via email.

 All articles
 About Sinclair Studios