;fill-rule:nonzero;stroke:%23000;stroke-width:48.7px;'/%3e%3cdefs%3e%3clinearGradient%20id='_Linear1'%20x1='0'%20y1='0'%20x2='1'%20y2='0'%20gradientUnits='userSpaceOnUse'%20gradientTransform='matrix(2406.25,-2101.13,2101.13,2406.25,1086.43,2157.14)'%3e%3cstop%20offset='0'%20style='stop-color:%232d1f30;stop-opacity:1'/%3e%3cstop%20offset='1'%20style='stop-color:%239f5060;stop-opacity:1'/%3e%3c/linearGradient%3e%3c/defs%3e%3c/svg%3e)
VINDRIKTNING with ESPHome
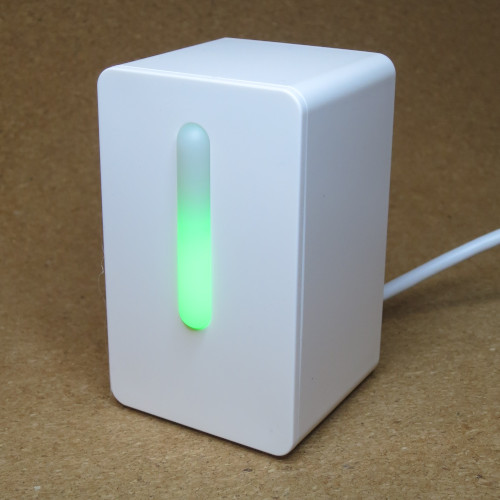
IKEA's
VINDRIKTNING
is an air quality sensor that samples particles in the air and illuminates an LED to report its
findings. The module also writes the sample data to a UART tx port,
making it possible to publish the sample and make it available to a home automation system.
Following Hypfer's work in receving and publishing the sample data with an Arduino project, ESPHome contributors soon built a PM1006 Particulate Matter Sensor component to simplify the process of setting up a UART sensor for ESPHome.
To follow the steps below, you will need:
- A VINDRIKTNING air quality sensor
-
An ESP-based breakout board with a
5Vregulator (like the Wemos D1 Mini ESP8266). - A narrow-barreled PH0 screwdriver to access the deeply set case screws.
- Soldering equipment.
- A hot glue gun (optional, but recommended).
- Home Assistant and an ESPHome dashboard configured and running, ready to program ESP devices.
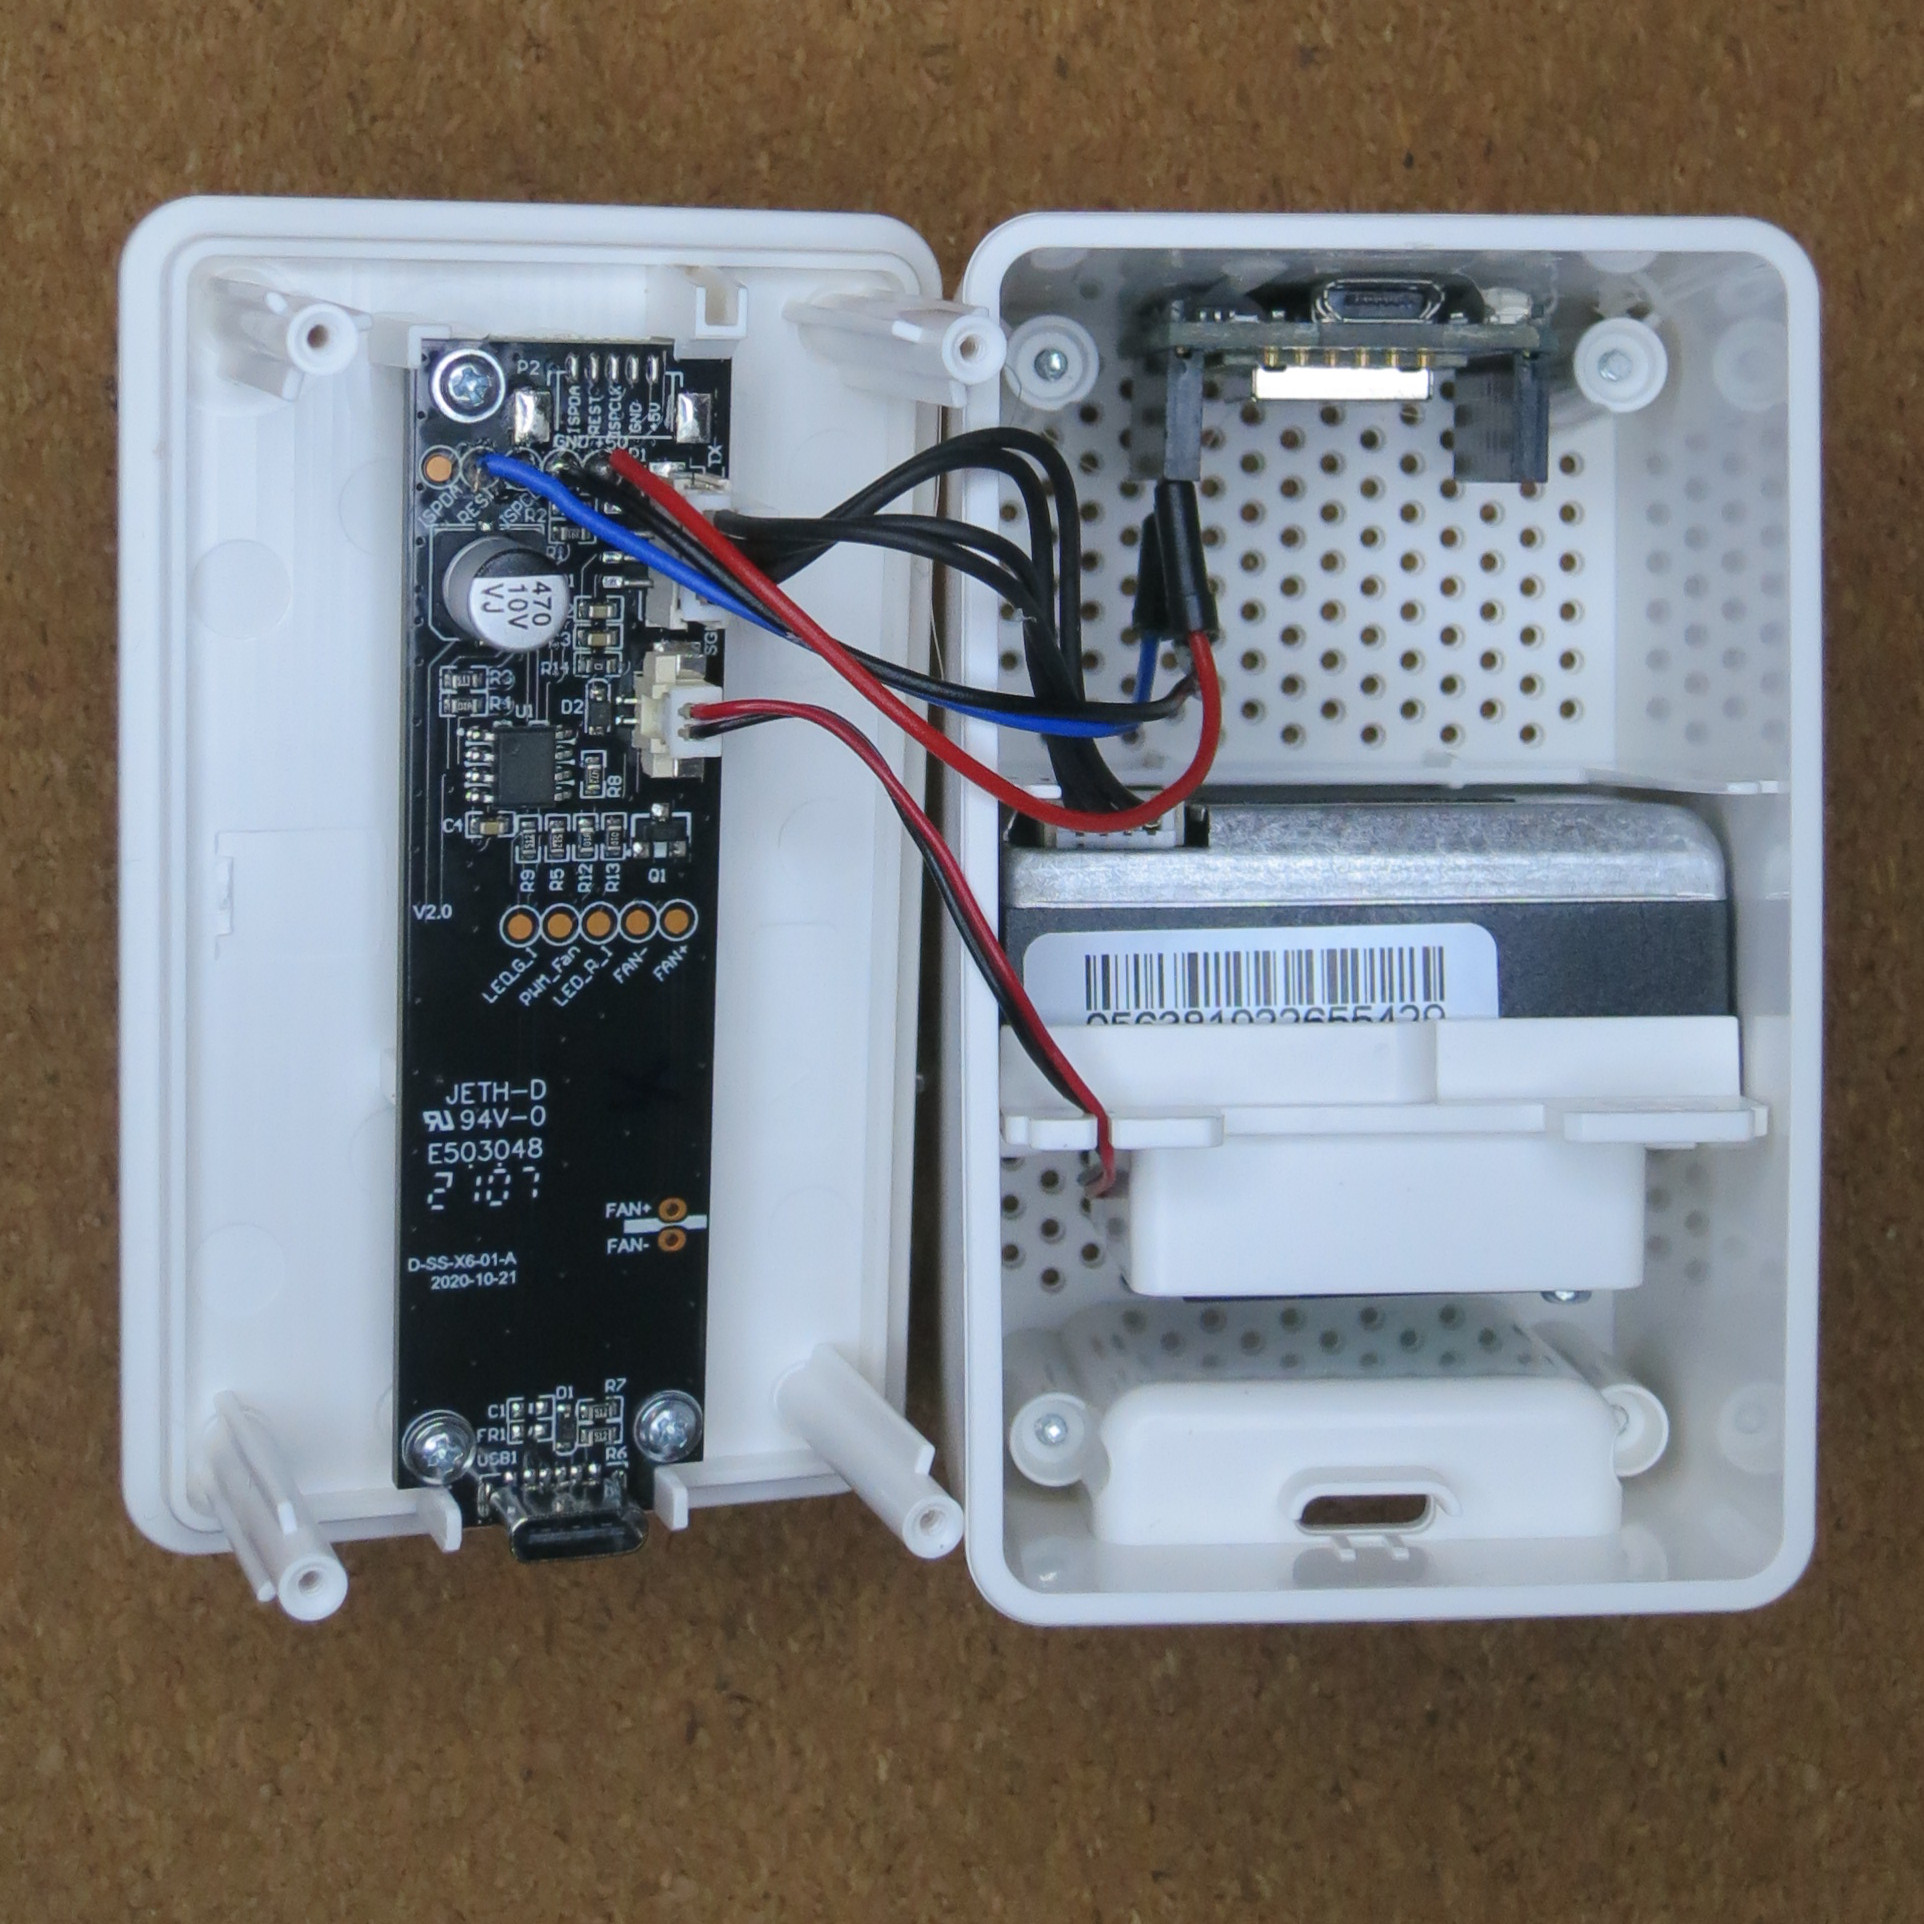
Hardware steps
- Disassemble the VINDRIKTNING and remove the main board.
-
Tin the
REST,GNDand+5Vpads. - Cut, strip and tin some jumper wires. Solder them in place.
-
Attach header blocks to the ESP board, if required. This walkthrough uses
D2,GNDand5Vpins.

D2.
ESPHome configuration
Use the ESPHome dashboard to configure the ESP. Remember to keep secrets in a separate
configuration file. Ensure the
static_ip is an available and assignable IP address.
First, install a basic ESPHome
esphome:
  name: air-quality-sensor

# Depends on the ESP and breakout board model.
esp8266:
  board: d1_mini

logger:

api:
  encryption:
    key: !secret air_quality_sensor_api_encryption_key

ota:
  password: !secret air_quality_sensor_ota_password

uart:
  # Software uart on this port isn't realtime, but the baud rate is slow.
  rx_pin: D2
  baud_rate: 9600

sensor:
  - platform: pm1006
    pm_2_5:
      # The name of this sensor will show in Home Assistant
      name: "Particulate Matter <2.5µm"

wifi:
  ssid: !secret wifi_ssid
  password: !secret wifi_password
  # Skip searching for available networks first
  fast_connect: true
  # Connecting is faster and more reliable if you don't wait for DHCP.
  # Just make sure the router is also configured to reserve this address for your device.
  manual_ip:
    static_ip: !secret air_quality_sensor_wifi_manual_ip_static_ip
    gateway: !secret air_quality_sensor_wifi_manual_ip_gateway
    subnet: !secret air_quality_sensor_wifi_manual_ip_subnet
Log in to your router and reserve the static_ip IP address. Keep
note of that address and the api_encryption_key.
Assembly steps
- Secure the main board in the VINDRIKTNING housing and reconnect wires to the sensor and fan.
-
Hot glue the ESP breakout board inside the VINDRIKTNING housing in a place that minimises
obstruction of the sensor. Ensure the back panel still attaches properly.
- Note: In spite of this photo, mount it below the fan for best results. More information in this discussion thread in the Home Assistant forum .
-
Connect the wires (
RESTtoD2,GNDtoGND, and+5Vto5V).
Adding it to Home Assistant
In Home Assistant, add a new ESPHome integration. Follow the workflow steps, supplying the host IP address and encryption key from before. Once added, the device should appear with a single sensor: "Particulate Matter <2.5µm".
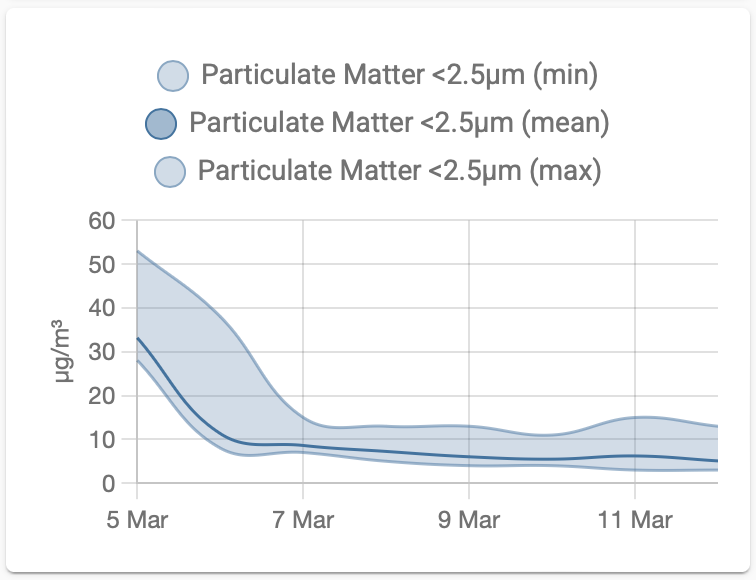
In the screenshot above, I added the sensor to a
statistics-graph Lovelace card. Next step is to use it for a
Node-RED automation; such as
dispatching a notification if the particulate matter starts to average above 30µg/m³.
If you have feedback or questions about this article, let's catch up via Mastodon or email.

 All articles
 About Sinclair Studios