;fill-rule:nonzero;stroke:%23000;stroke-width:48.7px;'/%3e%3cdefs%3e%3clinearGradient%20id='_Linear1'%20x1='0'%20y1='0'%20x2='1'%20y2='0'%20gradientUnits='userSpaceOnUse'%20gradientTransform='matrix(2406.25,-2101.13,2101.13,2406.25,1086.43,2157.14)'%3e%3cstop%20offset='0'%20style='stop-color:%232d1f30;stop-opacity:1'/%3e%3cstop%20offset='1'%20style='stop-color:%239f5060;stop-opacity:1'/%3e%3c/linearGradient%3e%3c/defs%3e%3c/svg%3e)
Connected Kettle: Scale and display
The ESP32 is fast becoming one of my favourite toys, it's an excellent form factor for embedded
Wifi-enabled Arduino projects and is far cheaper and easier to use than Wifi shields for the
Arduino Uno. It is the central node of the Connected Kettle, supporting a variety of input and
output instruments wired directly to the controller while also setting the scene for remote
interaction with a  Home automation platform. Stage 1 of
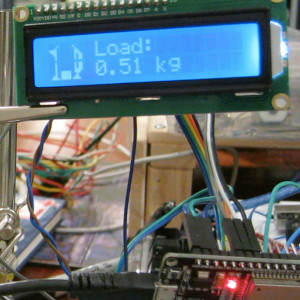
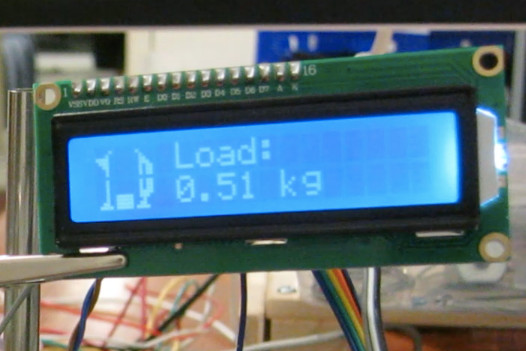
this project is to set up a tight feedback loop, where it uses a load sensor as a scale to
detect the kettle weight, and displays the weight on an LCD.
Home automation platform. Stage 1 of
this project is to set up a tight feedback loop, where it uses a load sensor as a scale to
detect the kettle weight, and displays the weight on an LCD.
The video above shows how the load sensor can be used to approximate the fill level of the kettle. In this example I have pre-set the "tare" weight to the empty jug, so the weight shown only includes the water poured into the jug.
Devices
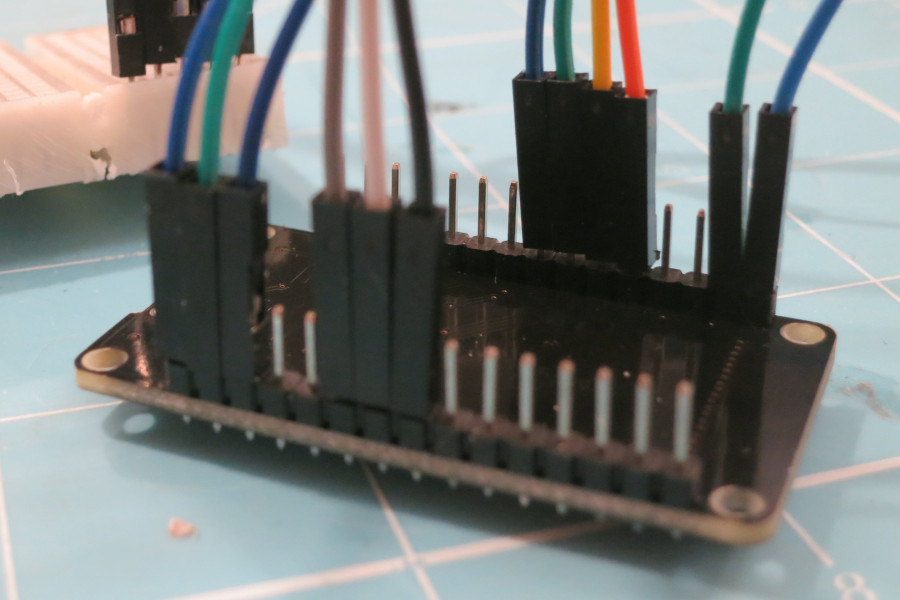
Fortunately, these components are relatively self-contained, so I can wire everything up without needing a breadboard or many other circuitry components. The LCD was left over from an International Nodebots Day event, while the ESP32 and load cell were just AliExpress purchases.
Hardware assembly
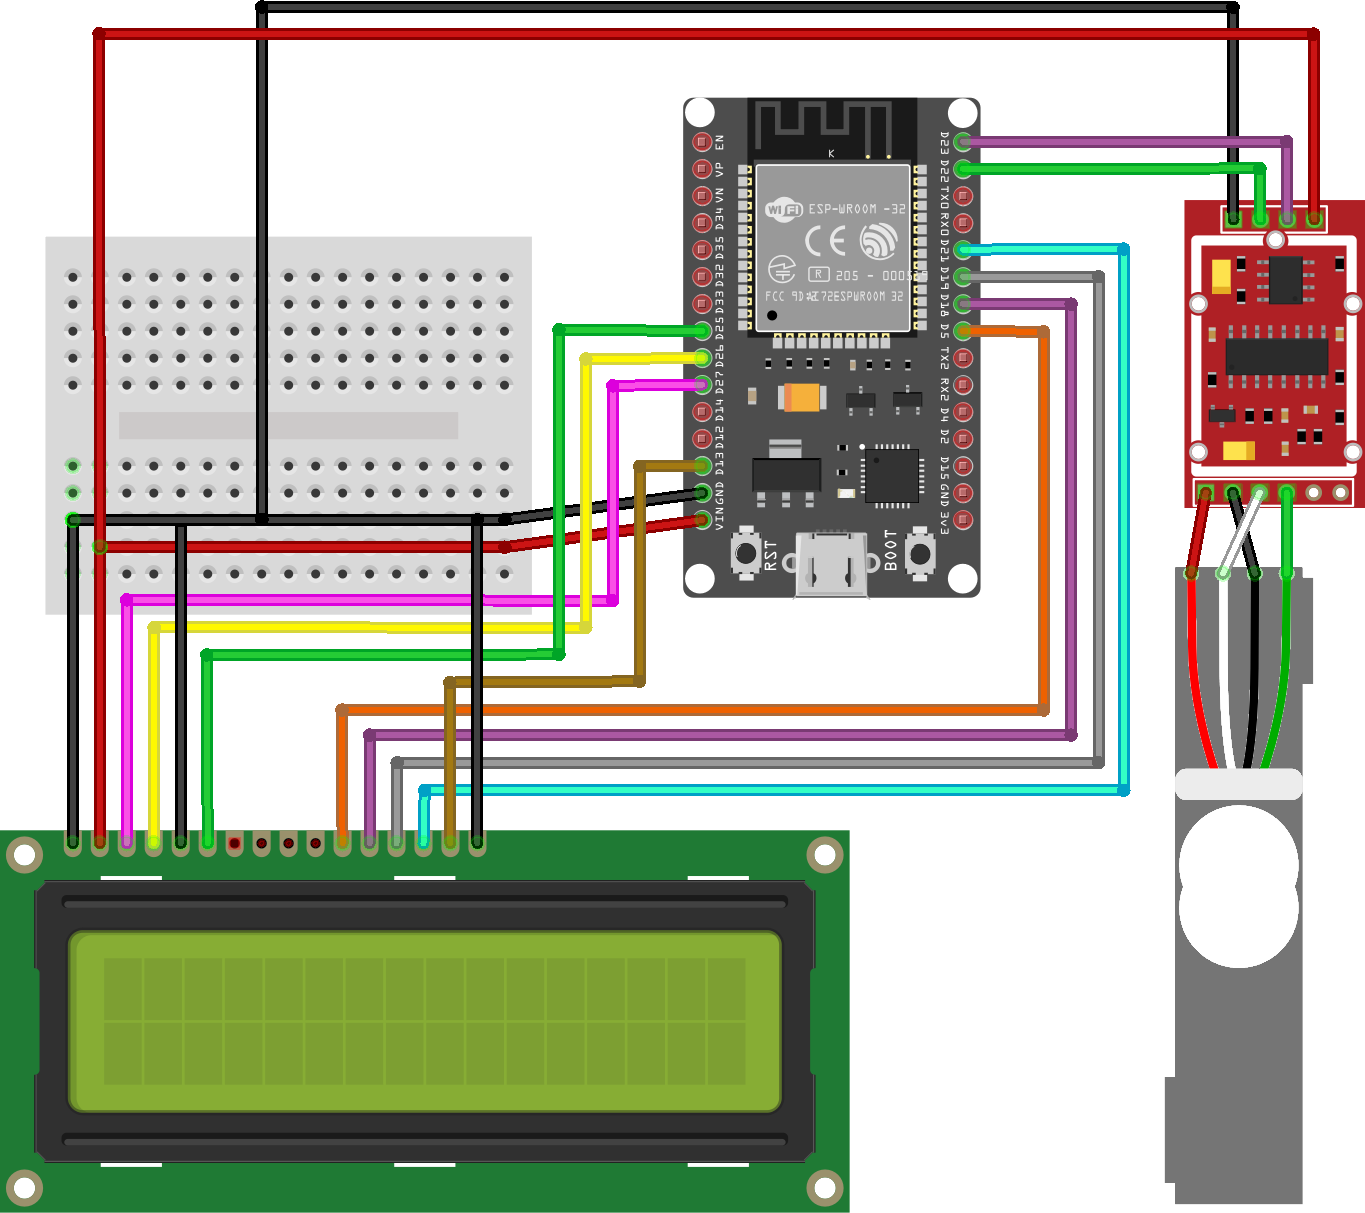
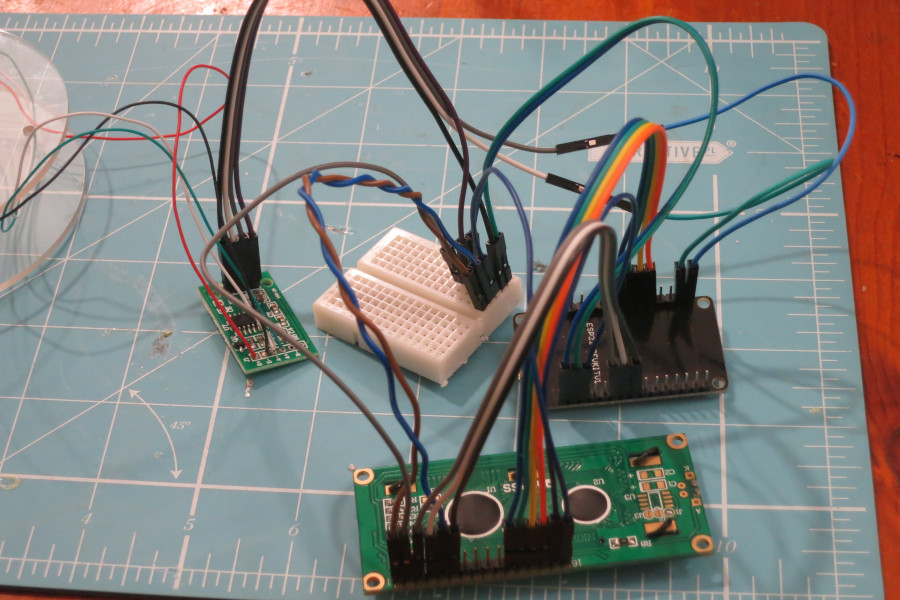
The most difficult part of hardware assembly is understanding which ESP32 pins support which functionality. Following guides such as Random Nerd Tutorial's ESP32 Pinout Reference helped immensely.
Code layout
This project uses a variety of components, so for ease of readability and maintainability it uses separate classes to encapsulate specific responsibilities. This simplifies the main file dramatically:
$ cat main.cpp

#include <display.h>
#include <scale.h>

/* ... */

Display display(
    LiquidCrystal(RS, EN, D4, D5, D6, D7, BACKLIGHT_PIN, POSITIVE),
    CONTRAST_PIN,
    CONTRAST
);

Scale scale(DOUT_PIN, SCK_PIN);

void setup() {
    display.connect();
    scale.connect();
}

void loop() {
    float load = scale.read();
    display.clear();
    display.print_load(load);
}
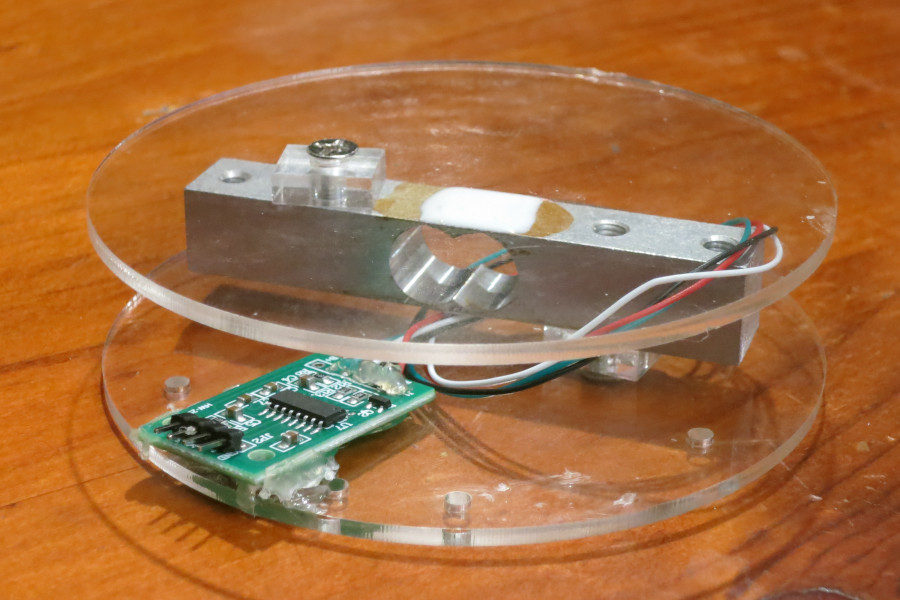
Using the load cell
The load cell interface uses the HX711 library, which can be calibrated with an offset and multiplier to get the best results from the load cell. Calibrating a load cell for the first time requires using an object with a known weight (like a mobile phone) with an Arduino sketch that allows the offset and scale to be adjusted in real-time, as shown in this HX711 Load Cell Amplifier Interface tutorial.
- With nothing on the scale, locate the offset where the reading gives a value of "0"
- With the mobile phone on the scale, locate the scale factor where the reading shows the weight of your phone.
With the calibration values known, the "scale" component of the program is basically complete. I only added one more catch, to ensure that we don't accidentally report negative weights if there is a calibration issue.
$ cat scale.cpp

#include "scale.h"

Scale::Scale(
    const int dout_pin,
    const int sck_pin
) : _dout_pin(dout_pin), _sck_pin(sck_pin) {}

void Scale::connect() {
    _loadcell.begin(_dout_pin, _sck_pin);
    _loadcell.set_scale(_LOADCELL_SCALE);
    _loadcell.set_offset(_LOADCELL_OFFSET);
}

inline float max(float a, float b) { return a > b ? a : b; }

float Scale::read() {
    return max(_loadcell.get_units(10), 0);
}
Using the LCD
HD44780-compatible LCDs are relatively straight-forward; the official Arduino "Hello World" tutorial for LCD displays covers most of the functionality that this project uses. As well from normal LCD controls, the New LiquidCrystal library handles contrast and backlight brightness through the library itself, avoiding the need for extra resistors in the circuitry.


The LCD also supports up to eight customisable 5x8 pixel icons, so I drew some icons to represent the kettle and some approximate "fill" states. Each character is represented by eight bytes, one byte for each character row.
$ cat display.cpp

#include "display.h"

byte Display::_KETTLE_LEFT_TOP[8] = {
  0b00000,
  0b00001,
  0b00010,
  0b11110,
  0b01110,
  0b00110,
  0b00010,
  0b00010
};

/* ... */

Display::Display(
  LiquidCrystal lcd,
  unsigned contrast_pin,
  unsigned contrast) : _lcd(lcd), _contrast_pin(contrast_pin), _contrast(contrast) {}

/* ... */

void Display::connect() {
  pinMode(_contrast_pin, OUTPUT);
  analogWrite(_contrast_pin, _contrast, 255);

  set_backlight(true);
  _lcd.begin(16,2);
  _lcd.createChar(0, _KETTLE_LEFT_TOP);
  _lcd.createChar(1, _KETTLE_LEFT_BOTTOM);
  /* ... */
}

/* ... */

void Display::print_load(float load) {
  _lcd.setCursor(4, 1);
  _lcd.print("Load: ");
  _lcd.print(load, 2);
  _lcd.print("kg");

  print_kettle();
  print_kettle_filling(load);
}

void Display::print_temperature(float temperature) {
  _lcd.setCursor(4, 0);
  _lcd.print("Temp: ");
  _lcd.print(temperature, 0);
  _lcd.print((char)223);
  _lcd.print("C");
}

void Display::print_kettle() {
  _lcd.setCursor(0, 0);
  _lcd.print(char(0));
  _lcd.setCursor(0, 1);
  _lcd.print(char(1));
  /* ... */
}

void Display::print_kettle_filling(float load) {
  if (load < 0.25)
  {
    _lcd.setCursor(1, 0);
    _lcd.print(" ");
    _lcd.setCursor(1, 1);
    _lcd.print(char(4));
  }
  else if (load < 0.5)
  {
    /* ... */
  }
}
Take-aways
- Prototype new sensors and libraries with small sketches before integrating them into a larger project. Use two-way serial communication (typing in commands and monitoring changes) to modify and experiment with configuration values quickly.
- When splitting a project into smaller stages, design each stage to result in something usable. This helps to distribute the risks and rewards evenly throughout each step.
Next steps
The circuit works well, but it is difficult to use without an enclosure to secure everything in
place.
 Connected Kettle: Enclosure is all about prototyping and 3D
printing the enclosure.
Connected Kettle: Enclosure is all about prototyping and 3D
printing the enclosure.
This article is part of the 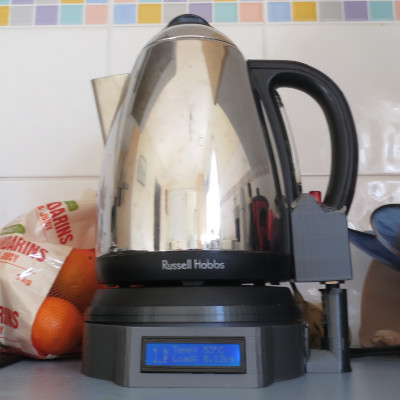 Connected Kettle set.
If you have feedback or questions about this article, let's catch up via email.

 All articles
 About Sinclair Studios