;fill-rule:nonzero;stroke:%23000;stroke-width:48.7px;'/%3e%3cdefs%3e%3clinearGradient%20id='_Linear1'%20x1='0'%20y1='0'%20x2='1'%20y2='0'%20gradientUnits='userSpaceOnUse'%20gradientTransform='matrix(2406.25,-2101.13,2101.13,2406.25,1086.43,2157.14)'%3e%3cstop%20offset='0'%20style='stop-color:%232d1f30;stop-opacity:1'/%3e%3cstop%20offset='1'%20style='stop-color:%239f5060;stop-opacity:1'/%3e%3c/linearGradient%3e%3c/defs%3e%3c/svg%3e)

LEGO: Tangara Design
I spent a few weeks prototyping various aspects of the model. The most interesting aspects were:
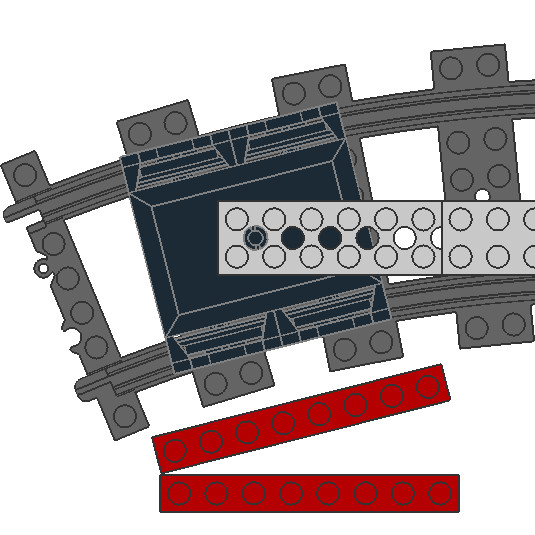
 LEGO: Tangara decorated bogies
- Pop-open
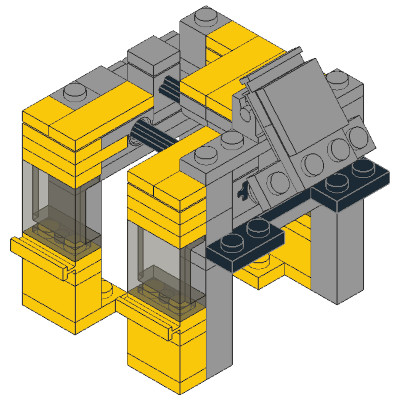 LEGO: Tangara Sliding Doors
 - Aligning the faceplate
Configuration
Tagara rolling stock includes "driving trailer cars" (D), and "non-driving motor cars" (N). A typical set is configured as D-N-N-D (four-car), or D-N-N-D-D-N-N-D (eight-car). The norm for LEGO passenger trains is a 3-car set, so my Tangara uses a D-N-D configuration instead. LEGO trains operate more safely with the motor in the leading car, so I've migrated it accoss to match.

Building the model
There are many tools in the LDraw system of tools. I chose LeoCAD due to its open-source nature and relative independance from the LEGO Group, unlike Bricklink Studio. By default it keeps files in the LDraw file format, which is compatible with a range of inventory management and rendering tools.
Layout
I opted against using a standard train base, and designed my own layout to maximise internal space for seating. This allows minifigs with simple decorations (hair, helmets, etc) to sit comfortably on the chairs. The saloons have fold-down seating, but these are less comfortable. In total, my Tangara has seating for 12 passengers.

Validation
LeoCAD focuses on placing parts independently in 3D space, which makes it great for exact placement of parts, but doesn't help when it comes to validation. At this point I used different techniques to validate the model.
Part availability
LDraw tools typically allow you to render any LEGO part in any known colour. Because Studio is backed by Bricklink, it is possible to validate the part and colour combinations and provide feedback in order for you to find replacement parts. For example, one of my early drafts required Part #2582 (Panel 2 x 4 x 3 1/3 with Hinge) in transparent black, but Studio's colour validator informed me that the part was never produced in that colour, and would not be available.
Collisions
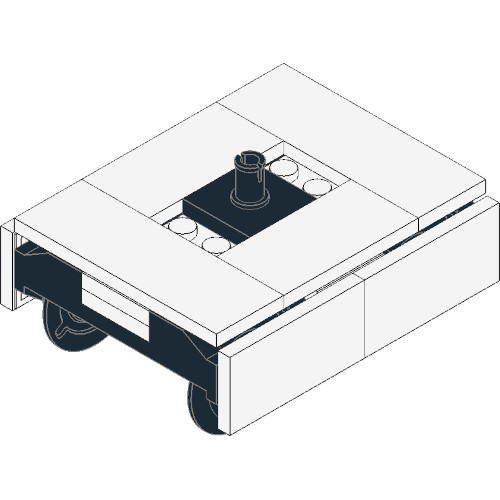
Since this model uses a custom base and bogies, I ran some experiments to validate my assumptions about how
 LEGO: Train bogies
pivot on
various
LEGO: Train bogies
pivot on
various 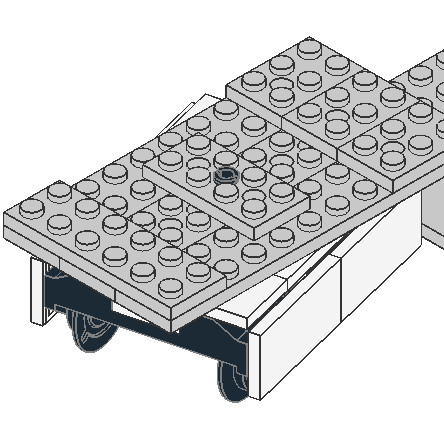 LEGO: Train bases. I also took advantage of Studio's collision detection, but it
only detect parts that partially overlap, not fully overlap. I needed a different approach to remove accidental duplicated parts.
LEGO: Train bases. I also took advantage of Studio's collision detection, but it
only detect parts that partially overlap, not fully overlap. I needed a different approach to remove accidental duplicated parts.
Stability
Studio also helped with initial stability estimates (identifying loose bricks), but I got the best results by physically prototyping the train carriages and the mechanisms around them.
Creating build steps
LDraw file formats have native support for "steps", so a builder is able to start with a single brick and work up from there. I built the model first, and then (starting from the end) removed pieces step-by-step until I had reached a single part at the base of each carriage.
I discovered (the hard way) how important it is to create the build steps before ordering any parts:
- It reveals any accidentally duplicated parts.
- It shows if there are any pieces that are not properly supported.
- It ensures that you have point-in-time instructions for how the model goes together, once the parts arrive.
Would you like to know more?
If you have feedback or questions about this article, let's catch up via Mastodon or email.

 All articles
 About Sinclair Studios